This post is further to an earlier post about how to build a DIY decking kit, where floor load width and components were discussed. If you are starting out, it’d be a good idea to read that first before you get to this post which covers building the substructure of your decking.
Once you have calculated the layout of your deck and have purchased the appropriate timber, you can start to build the substructure of your deck. Although it may not seem like it, the substructure of your deck is the most important part of the deck and if installed correctly it will ensure that the finished decking will be stable, structurally sound and most importantly, level.
You will need to start by marking your post locations. With any luck you won’t need to excavate the site, but if you do this is your first step. Before digging anything it’s also wise to check with relevant services and authorities to make sure that you’re not about to rupture a sewer or an electrical line. If you are excavating, it makes sense to establish how far down you will have to go before you start to dig. It also makes sense to have a plan regarding the drainage of the site once you’ve built the deck, to ensure that you don’t have issues in future.
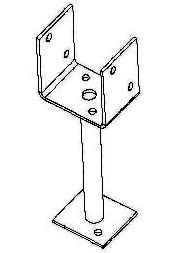
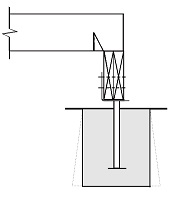
To calculate how far you will need to dig, you need to establish your joist to bearer attachment method (covered in more detail later) I’d recommend butting your joist into your bearers to remove the need to excavate the additional height of each joist. In getting your calculation exactly correct you need to leave allowances for your post shoes (we recommend that all posts be housed in shoes as this will ensure that your deck lasts for the longest possible time without being affected by pests or rotting of any sort) You will then need to add the height of your bearers and decking boards to establish the distance you need to dig (for decking that is at ground level)
If your deck is not at ground level, you can stake your site and run a string line at the level of the top of the decking boards. When you have your site ready and you’ve marked your post locations according to the plans (using a string line and measuring tape) you can dig holes for each of the footings. The hole size required for your particular footings and area will vary, so please check with your council/shire as to what’s required. Generally speaking for stirrup footings you need at least 200mm underground (and your hole needs to be another 100mm deeper than that)
tornado footings need to be 300mm underground, as well as another 100mm deep.
Please don’t take these measurements as gospel though as it’s important to ensure that your footings are adequate. When digging holes for your posts, you should taper the hole so that it looks like the bottom of a champagne cork, this will add stability to the finished footing. Once you have your footings in place, attach your posts to your post shoes. Prepare and pour concrete into holes, and sink post shoes into the wet concrete to the appropriate level. Clamp or prop each post at the correct angle so that it won’t move until the concrete dries completely. Allow the footing 24 hours to set before doing anything else.
Once the concrete has dried and your posts are set in position you will need to cut the tops of your posts to the correct height. Getting this correct is essential to a level deck. Use the string lines that you’ve set up at the desired level of the deck as a guide and cut the tops off of each post at the correct height. The post tops can be a little lower than the tops of bearers so the cut doesn’t need to be perfect. Use either a circular saw or a hand saw to do so. You will need to saw at 90 degrees to the ground, so you’ll need to be extremely careful and work safely at this point. Depending on your saw setup you’ll need to establish the safest way to complete this task without putting yourself or anyone else at risk.
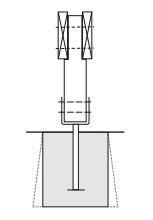
If you are using a handsaw, be sure to brace the post so that you don’t cause any unwanted sideways movement of the footing. With your post tops all cut and level, you need to address how your bearers will attach to your posts. AS1684.2 1999 stipulates that decking construction requires the provision of double bearers. This means that each post requires two bearers to join it and the next post. There are a variety of acceptable options to achieve this. The first is to house a bearer on either side of the post (diagram below)
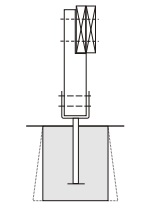
This requires that you cut a 20mm deep notch in the posts on either side to house the bearers, and bolt them both through the post. If you use this method to secure your bearers also use blocking pieces of timber at 900mm centres from each post, fixed with nails so that there is no movement of your bearers. The second method you could use is to notch the post 45mm and attach two bearers together, bolting through the bearers and posts to attach (diagram below)
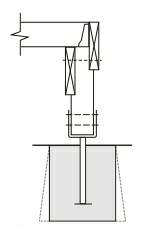
If you use this method, nail the bearers together at 300mm centres to prevent any movement. The third method that you can connect with is to notch the post 20mm on each side at different levels so that one bearer is flush with the top of the post and the second has enough clearance over the post to butt into the joist and sit flush with the top of the joist. This method allows you to have a neat edge on the outside of the deck if it is visible. (diagram below)
If you are limited in clearance and excavating is difficult you can use just a post shoe to house your bearers and eliminate the posts.
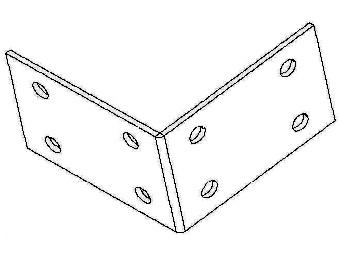
Once you’ve selected your attachment method, mark your post tops and cut the appropriate notches into each post. Once complete, you can lift your bearers into position and clamp them into place, then drill and bolt them together using Cup head bolts. Once you’ve done this you can cut the ends of the bearers to size. You can reinforce the framework for your deck by using L brackets on the inside corners of the framework (or where the bearers meet the ledger (if this is the case))
The final step in building your decking substructure is to attach the joists to your bearers. Again there are a few variables at play here, which we will go through. The first step in attaching your joists should be to mark out where they will run as per your plans so that you have a clear idea of what you need to do. If you are taking your deck all the way to the wall of your home, you will need to determine the manner in which you’d like to connect the deck to the wall and how this will affect the placement of your joists.
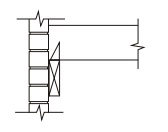
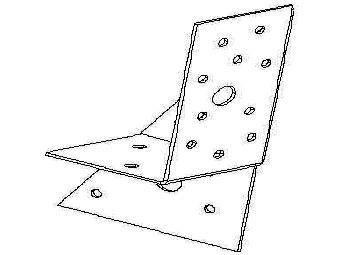
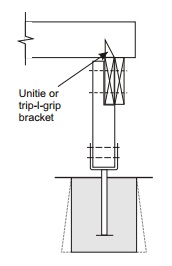
You will need to install what is called a ledger (a piece of timber that is bolted into your wall) to which your joists will connect. Where the ledger is installed is determined by how your joists connect to your ledger. There are two generally accepted methods, firstly you can place the joist on top of the ledger and up against the wall, connecting the joist to the ledger with nails and a trip l grip bracket (image below)
(Trip L Grip Bracket)
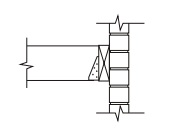
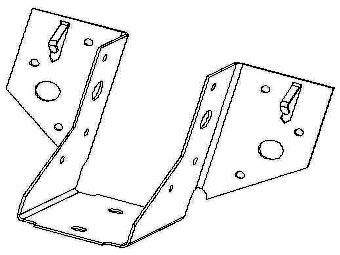
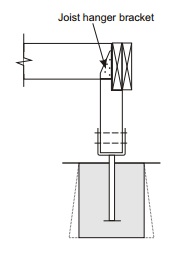
Secondly, you can choose to butt the joist straight into the ledger and use a joist hanger bracket to fasten the joist in place with nails. (image below)
(Joist Hanger Bracket)
In connecting your joists to the bearers you can either run the joists directly over the top of the bearers or butt the joists into a bearer (if your bearers are laid out in the same manner as example 3 above) Depending on which approach you take you will either have to use trip l grip fasteners or joist hangers respectively. (images of each option displayed below)
Once you’ve connected your joists, trim the ends to size, and you are ready to install your decking boards. Please remember that if you have any unanswered questions about DIY decking we’d love to hear from you. We’d also love to be given the opportunity to quote on your decking project, regardless of where you are in Australia, we can ship a decking kit to you at great prices, designed to your exact specifications. We are also able to offer you a huge range of decking boards, Merbau, Kapur, a full range of Australian hardwoods and Clear Treated Pine.
If you missed it, or you want to review the basics of building a deck, check out the previous post on floor load width and components. Or you can move on to the third and final post in this series and learn how to install the decking boards.
And if you have not seen the video below yet, take some time (a little over a minute, to be precise) to watch how we build a deck, piece by piece.
Thanks for reading!

